Kid Pix Studio Deluxe on macOS

Kid Pix Studio Deluxe 🎨, released in 1998, is something I grew up using on school computers and on my mom's Mac. At its core, it's a paint program, but packed with a surprise and delight that's missing from a lot of modern software design. Regardless, it's fucking fun and I want everyone to be able to experience it.
For more background, I highly recommend reading Craig Hickman's personal history of Kid Pix and watching Just Another System's recent interview with Hickman about the unexpected legacy of Kid Pix.
Kid Pix Studio Deluxe runs on Mac OS 9. So unless you have an older Macintosh lying around (I do, but it's inconvenient), you'll need an emulator.
Emulators are basically just a way for your computer to imitate the hardware of another type of computer– you can use them to run Windows-only software on your Mac or arcade games in your browser.
The original shareware version of Kid Pix and Kid Pix 1.0 can also both be emulated in the browser! 💻
The emulator we'll use to imitate Mac OS 9 is called SheepShaver. It's got a cute little icon!

💾 Downloads#
- SheepShaver (February 2024 build)
- SheepShaver folder (February 2024 build)
- "New World" PPC ROM
- Bootable Mac OS 9 disk image
- Kid Pix Studio Deluxe install disk image
- MacinTalk installer
Big props to Redundant Robot for providing the OS 9 disk image and ROM.
You'll also need to have a way to open .sit (StuffIt) archives. I like The Unarchiver for this, but you might already have something else installed.
📺 Setting up the emulator#
Start by downloading everything in the above Downloads section, and unarchiving anything that's zipped or stuffed or whatever.
The SheepShaver folder is where the really important stuff goes, so move it out of your Downloads into either your home folder or Applications. Then move the following files into it:
SheepShaver.appOS9.imgMac OS ROMmacintalk3.imgKid Pix Studio Deluxe.toast
Create another folder, preferably in your home folder, that you'll use to sync files in between your computer and the emulated operating system (I always name mine sheepshare, which is what I'll use to refer to this folder from now on).
Configure SheepShaver using this guide. Keep the following in mind for Step 3:
- When creating the disk image that will be the "virtual hard disk", make sure it's at least 500 MB. If you plan on using the emulator for any other applications, bump that minimum up to 1000 MB
- The Unix Root setting corresponds to the
sheepsharefolder you made earlier - Instead of an install CD image, we're using a pre-installed disk image. You'll need to click "Add..." and open
OS9.imgso that SheepShaver has something to boot from (don't check the CDROM box) - While you've got Preferences open, add
macintalk3.imgandKid Pix Studio Deluxe.toastas disks, too
Once you're done configuring SheepShaver, you can quit (Ctrl-Esc) and open it again to boot for the first time!
During start up you'll be asked to initialize a new volume (the virtual hard disk created earlier). Give it a name (I'll call it System) and choose Mac OS Extended for the format.
📀 Installing Kid Pix#
You're now using Mac OS 9 inside of macOS. That's pretty cool by itself! 🎉
Before we install Kid Pix, we need to do a little tidying. Right now the System disk is empty, but we want to make it bootable like OS9. Luckily, this is as easy as dragging the System Folder folder from OS9 to System.
Once that's done, open up System Folder > Extensions and also open the MacinTalk Temp drive. Drag everything in the MacinTalk Temp > Into Extensions folder into Extensions.
You can now install Kid Pix from the installer "disk" on the desktop! Just double click and it'll walk you through the steps. Make sure you choose to install it on the System disk.
Now, open SheepShaver Preferences, select OS9.img from the list, and click "Remove". Do the same for macintalk3.img. Close SheepShaver (select "Shut Down", not "Restart").
Launch SheepShaver again and you'll be able to open Kid Pix!
🎷 Tips#
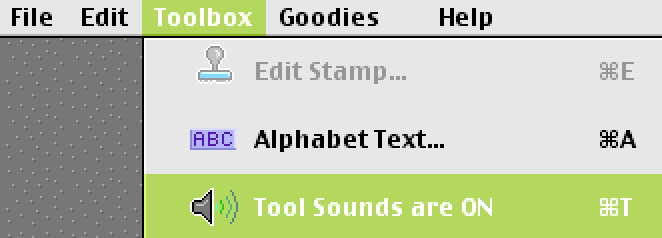
Make sure to enable sound effects (under the Toolbox menu) when in Kid Pix mode
"Picture" files saved by the main Kid Pix program are supposed to be just PICT images. There's something weird about them though, and I've only been able to convert them using Photoshop 😰 So for your final images, use "Export a Graphic" instead of "Save a Picture"
Leave
Kid Pix Studio Deluxe.toastmounted as a disk within SheepShaver, as some of the features rely on files that don't get copied over during install 🤔
🛠 Caveats#
While this is the most complete copy of Kid Pix Studio Deluxe I've been able to find online so far, it's not perfect. Neither is the emulator!
What does work:#
- Kid Pix mode and most of its features
- Moopies
- Stampinator (sometimes)
- Slideshow (sometimes)
- Digital Puppets (at your own risk)
What doesn't:#
- Wacky TV (seems like it loads movie files alright, but can't display the video)
- "Pick a ColorMe" in Kid Pix mode (files are missing)
- Stamps work 🙏🏻, but when mousing over the canvas with them there's significant lag (this seems like an emulator issue)
Did these instructions work? Show me what you made! Did they not work? Tell me what broke. I'm @cubeghost on Twitter, and the source of this article is on Github.